Wednesday, May 04, 2011

Real Animation

Here is my favorite run cycle from a Clampett cartoon:

I think it's Scribner. It's interesting how awkward (and sloppy) the individual frames are as opposed to how magnificently smooth and powerful the motion is.


There are 6 drawings on ones for each step.


The rest of the scene is great too. Such amazing force!

Full Clip


You can buy this set of rare Snafu cartoons on Amazon. This is the best set there is. All the cartoons are in prime shape and unlike the older Snafu sets, the films are not cropped. The whole image is sharp and full screen. All the cartoons are from the top animators and directors of the mid 40s - when animation was at its height. A killer collection.

There is a really cool UPA cartoon on here too.

NO DVNR!! They look just like the films themselves. better restoration than the actual Warner Bros. Looney Tunes sets.

Saturday, April 30, 2011

coming


Thursday, April 28, 2011

another peek

Wednesday, April 27, 2011

quick peek


Clip 4


I animated this in Harmony using both straight ahead traditional drawing and some tweening Flash type tricks

of course you couldn't get lines like this in Flash-not easily anyway. Once I got the whole scene set up and the main drawings done, most of the rest were drawn clean in 1 shot with no real roughing needed


I moved the head up and down using the camera peg in Harmony on a 12x beat. the whole cartoon is structured to a 12x 4/4 tempo

the legs are animated straight ahead, 6x per step, 2 steps per beat

the mouths were animated mostly straight ahead and moved up and down with the pegs as the head

the eyes are a combination of straight ahead drawing, with some shrinking and growing using scaling and tweens for accents

I put the pupils on a separate layer from the eyes so I could overlap the accents and actions

Prediction:
I think when I am totally confident with using the program I will hardly ever need to rough anything again, because it's so easy to draw confident lines. Drawing confident shapes right off the tip of the stylus is harder and I'm not so confident with that yet. Not as confident as with a pencil but it's coming

That's why I'm hoping that Harmony will eventually allow animation be to be done in the country again when animators can just whip out finished animation that's already 90% clean

There is one Korean studio that has Harmony but they take everything that was drawn directly on a cintiq (here in LA) print it out then animate it on paper and scan it all back into Harmony-which seems like a complete waste to me. Might as well just finish it here and leave it all in the computer.

WATCH ADULT SWIM NEXT WEEK TO SEE THE WHOLE BUMPER

Wednesday, April 20, 2011

Tuesday, April 19, 2011

Inking In Harmony

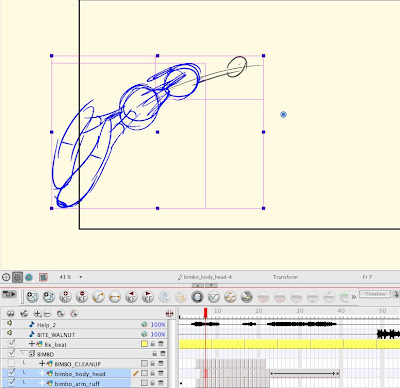
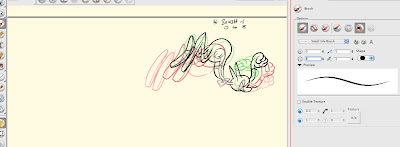
I roughed this character's body on 2 layers
1) Body
2) arms (because I wanted to overlap the timing of his arm with his body

Then I made another layer above the 2 rough layers, just for my cleanups
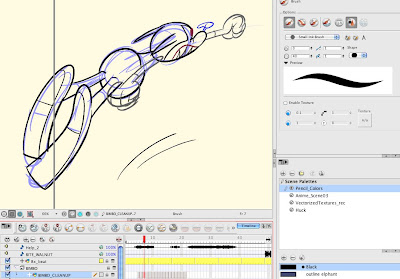
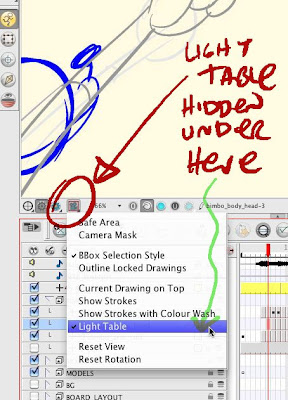
You can turn off individual layers and just see the clean up. I go back and forth to check everything. One problem is that the layers underneath are just as dark as the layers above so it makes it hard to see what you are doing. But you can turn on "light table" to make the other layers less opaque. (if you can find it). I would rather be able to just set a & for other layers but that doesn't seem to be an option. If you know how to do this, let me know!
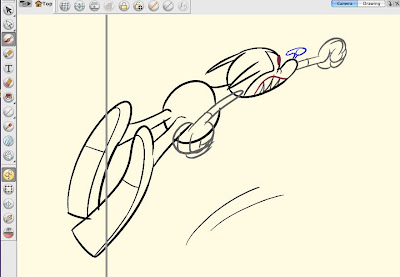
You can turn on onion skin to see the progress of your cleanups and make sure they are connecting smoothly
THICK AND THIN LINES:
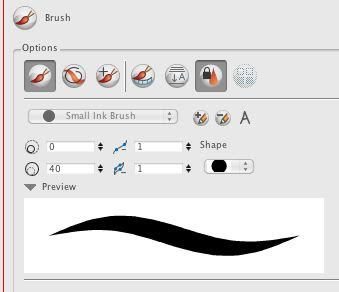
You can control the thickness of the lines by setting the numbers. My character starts in the scene big and then flies away and gets small.
For the bigger drawings, I set the width at 40, then as he gets smaller, I reset the width as I go until it becomes about 3.

This way the relative thickness of the lines stays as consistent as I want.
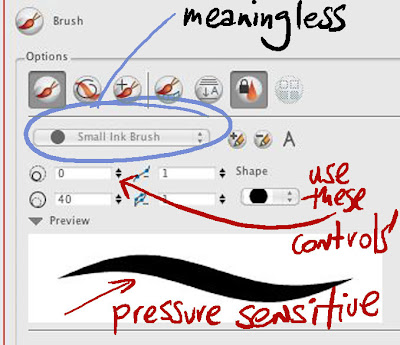
It takes practice to control the thick and thin lines, but the brush is pressure sensitive and after awhile I got the hang of it.

It is much easier to get good lines in Harmony than in Flash. I assume it's the same for Animate Pro. Now that I am used to it, I would never go back to Flash or even paper to animate.

You can also change the thickness of the lines by pressing the "O" button on the keyboard. It doesn't always work, but when it does, it's faster than setting the numbers in the menu.

The less menu items you have to drag around or find, the less you break the flow of your animating.

Unfortunately, too many essential commands are buried in multiple mystery menus and I am constantly having to stop being creative to find and reset things that should be more obvious, but I will make a list of some of those and suggest that Toonboom make them easier to use.

I will get Alex to upload this clip both in rough and clean form so you can see how they look moving.