ROD SCRIBNER LOVES WRINKLES!
 Here is a really cool frame from Tex Avery's "Heckling Hare". It's a hilarious scene animated by Rod Scribner.
Scribner loves to draw lots of extra wrinkles and brow folds on his characters, yet he still keeps them appealing and solid. They are not just arbitray lines and details floating around on the head. They make sense.
They wrap around the structure of the head and they describe certain things-expressions, eyebrows.
At first glance all the wrinkles make the drawing look complicated, but if you break it down to its forms first, then it will help you understand the drawings better.
Scribner uses the same classic principles that Bob McKimson and all the old animators used, but he applies them to his own style.
HOW TO STUDY OTHER PEOPLE'S ART
You can learn a lot by copying frames and animation from old cartoons. But the way to do it is:Don't draw straight ahead.
Build up the drawing using proportions and construction. The Preston Blair Book explains this method of drawing very well, but I will help demonstrate it for you.
STEP 1 - PROPORTION + ANGLES


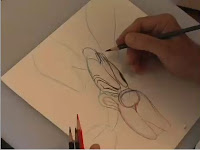
First, I measured the proportions of the characters and copied the proportions. Then I sketched in the rough forms that make up the poses, and drew straight lines through the forms to check that the angles the heads and bodies are tilted on look like the film frame.

Bugs is made up of 3 major forms in the drawing:
1) Head
2) Neck)
3) Body
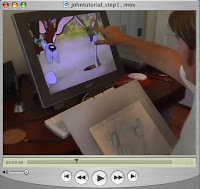
Download this zipped quicktime to your desktop:
JOHN K TUTORIAL, STEP 1 (20.8mb)


First, I measured the proportions of the characters and copied the proportions. Then I sketched in the rough forms that make up the poses, and drew straight lines through the forms to check that the angles the heads and bodies are tilted on look like the film frame.

Bugs is made up of 3 major forms in the drawing:
1) Head
2) Neck)
3) Body
Download this zipped quicktime to your desktop:
JOHN K TUTORIAL, STEP 1 (20.8mb)

STEP 2 - 2ND LAYER OF FORMS

After breaking down your characters into their first level of forms, then take each of those forms and find the next level of forms.
Start with the heads.
Bugs has one head.
The one head is made of of 2 major parts:
1) The cranium -upper part of head
2) The muzzle- lower part of head

Each of those levels is then further broken down into sections.
Upper head is made up
1 eyes,
2 eyebrows and
3 space around them.
all these sub forms have to wrap around the larger form that they are stuck to.
Lower head (muzzle) is broken into
1 nose area,
2 cheeks and
3 mouth
Each of those layers is in turn broken down into more parts.
Get it?
If not, watch me do it.
Download this zipped quicktime to your desktop:
JOHN K TUTORIAL, STEP 2 (28.4mb)

After breaking down your characters into their first level of forms, then take each of those forms and find the next level of forms.
Start with the heads.
Bugs has one head.
The one head is made of of 2 major parts:
1) The cranium -upper part of head
2) The muzzle- lower part of head

Each of those levels is then further broken down into sections.
Upper head is made up
1 eyes,
2 eyebrows and
3 space around them.
all these sub forms have to wrap around the larger form that they are stuck to.
Lower head (muzzle) is broken into
1 nose area,
2 cheeks and
3 mouth
Each of those layers is in turn broken down into more parts.
Get it?
Download this zipped quicktime to your desktop:
JOHN K TUTORIAL, STEP 2 (28.4mb)
STEP 3 - EXPRESSION
 Expressions are made up of
Download this zipped quicktime to your desktop: JOHN K TUTORIAL, STEP 3 (53.9mb)
 Expressions are made up of
Eyes,
Eyebrows
Mouth,
Cheeks,
Jaw
To get the eyebrow expression I usually just draw one line right through both eyebrows to describe the expression in one connected stroke.
Later I can erase the middle unibrow section. This way the eyebrows are related to each other in the final drawing and not just floating independently of each other.
When drawing the mouth expression, you have to make sure that the cheeks and jaw all relate to the mouth. They are all part of the same mechanism.
Once you have your basic expression wrapped around your head and muzzle, the last step is to add the details that help solidify the expressions.
Eyebrow wrinkles above the eyebrows. They follow the same direction as the main eyebrow line. They wrap around the head too, the same way the eyebrows do.
The mouth cheek area: The lower lip has to relate to the mouth shape and so do the cheeks.
Teeth: Draw them as blocks of teeth first, not as individiual teeth. Make the blocks be in the same perspective as the head.
Once the blocks look solid, them break them into individual teeth.
The mouth cheek area: The lower lip has to relate to the mouth shape and so do the cheeks.
Teeth: Draw them as blocks of teeth first, not as individiual teeth. Make the blocks be in the same perspective as the head.
Once the blocks look solid, them break them into individual teeth.
Download this zipped quicktime to your desktop:
 JOHN K TUTORIAL, STEP 3 (53.9mb)
Straight Ahead Drawing VS Constructed Drawing
 Now I drew this first drawing without first constructing it. I already know how it works so it only looks half crappy. But compare it to the below that I drew with construction first. See how much more solid and convincing and powerful it is?
ALL THE DETAILS FOLLOW LARGER FORMS

When you know your principles of drawing well , then you will be able to draw with much more confidence and you won't be afraid of details and you will have a lot more creative choices you will be able to make in your own work.

DOG - SPEED DRAWING (32.1mb)
REALLY IMPORTANT POINT! _Use Empty Space!
Look at all the empty space left in the drawings. The whole head is not filled with wrinkles and details.
If it was, you wouldn't see the expressions at all. You would just see a busy mess.
In order to see something important-you need to leave areas of space around the details that let you see the important stuff.
Make sense?
If you do this lesson, post a comment and I'll put it up in another post and critique it.
Thanks To Kali for making the films, and Marc for getting them in here.

